


It goes without saying that snacks are truly one of the greatest culinary blessings we have on planet Earth. Whether it’s the crunch of a perfect chip, or the bite of a flawless gummy, snacks are joy in edible form… and, as MunchPak fans, I’m sure you agree.
So, as an ode to the glory of snacking, today, I’ll be teaching you how to take your obsession to the next level… with a DIY backpack made of snacks and happiness.
Here’s what you’ll need:
The materials list for this DIY is pretty straight forward… You’ll need 1) A LOT of snacks and 2) Some very strong, transparent packing tape.


Step one: Go absolutely wild and acquire a lot of snacks.
For those who are like me and turn into Pacman at the sight of food, you might not have enough MunchPak snacks available to create a full backpack. In that case, grab a basket and embark on the most delicious shopping spree of your entire life.
Make sure you have at least 3 large bags of chips (for your base) and either long strips of something (e.g. Super Ropes) or several flat snacks that you can tape together to create straps (e.g. Fruit to Go, candy bars, etc.).

Step two: Create your backpack base.
This bit is simple: all you need to do is layer a few bags of chips together. I recommend doing three large bags or five medium ones, depending on how large you want your final backpack to be. Secure your base with plenty of tape.


Step three: Tape the straps onto your backpack base.
If you don’t have long strips of candy to use for your straps, tape together several candy bars or something flat like Fruit to Go. Make sure your straps are longer than your base by at least 6 inches.
Once you have your straps ready, lay them over the base and tape down the extra bits, ensuring they wrap over to the other side (like a big, snacky hug!). It should look like this:

Remember to use a lot of tape for this part, otherwise your bag might break mid-strut. Once you’ve taped down your straps for both sides, try the backpack on to make sure it fits properly. If the straps don’t feel secure yet, juuust keep tapin’.
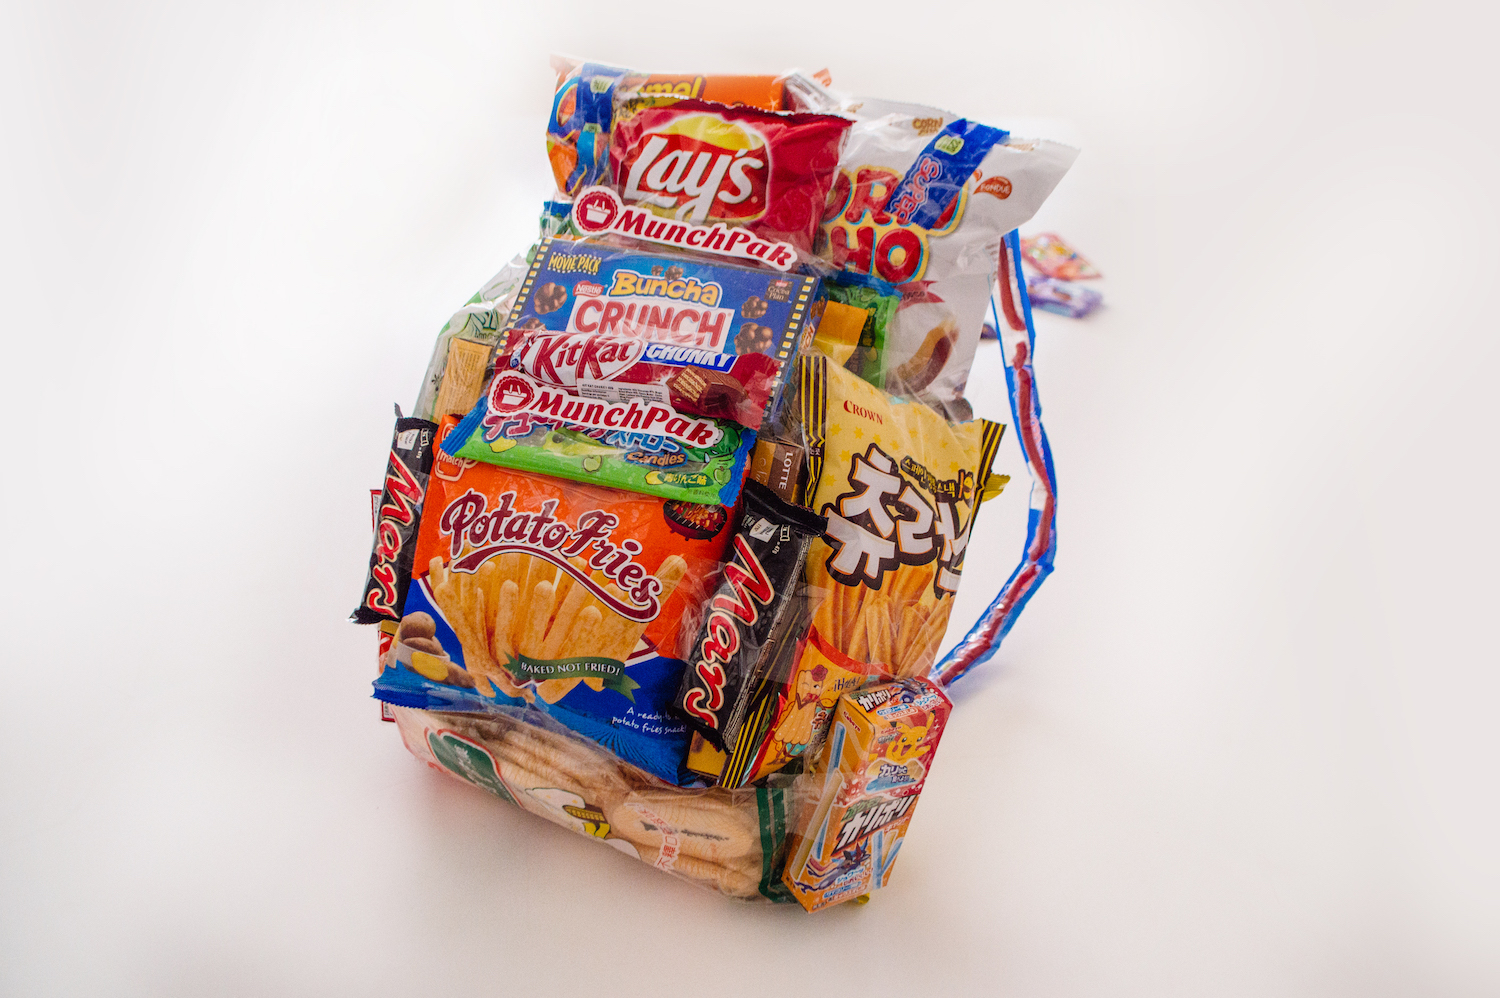
Step four: Layer on more snacks!
I like to keep things symmetrical, but you’re a strong, independent snacker who don’t need no rules. Add your favourites as you please, so long as you secure it all with truckloads of tape. Keep adding until you’re happy with the look and shape of your backpack!

Step five: Enjoy your new favourite accessory.
Weeping with joy is optional.

Here’s to hoping your other bags don’t get jealous…

